How Do You Track Whisper Progress Destiny 2
The Grasp of Avarice Dungeon is new with the Destiny 2 30th Anniversary Pack. There's a lot to do within its depths, and this guide covers all of it.
New in the Destiny 2: 30th Anniversary Pack is the Grasp of Avarice dungeon, sending Guardians deep into the loot cave from early in the franchise's life. At the cave's heart lies the key to starting the Gjallarhorn quest and unlocking the iconic Exotic rocket launcher.
Grasp of Avarice is one of the more substantial dungeons Bungie's made. It's a bit larger than both Pit of Heresy and Prophecy but falls just a little short of Shattered Throne. Thankfully, it has an amazing art style, great bosses, and some of the best rewards available right now in Destiny 2 .
This guide will cover all four encounters in the Grasp of Avarice, as well as the two puzzle paths. It also acts as a companion to our Gjallahorn acquisiiont and catalyst guides.
First Encounter: The Loot Cave Entrance
Select the Grasp of Avarice activity from the Eternity menu in the director, located beneath the Moon destination. You'll drop just before the fabled loot cave and see Hive and Fallen fighting over the riches contained within.
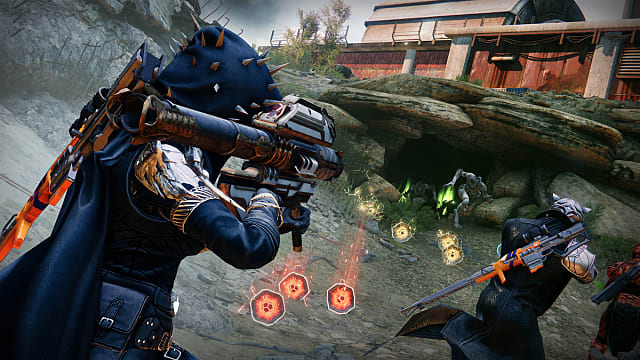
Clear the Fallen from the area and start taking your fight to the Hive. Every red bar enemy you kill will drop an Exotic engram (not really) that grants you the Burdened by Riches debuff. You'll have 30 seconds to either pick up another engram or die. You can hold dozens and dozens of stacks of Burdened by Riches, but you won't need to have that many to progress.
The Hive will spawn infinitely, but within the loot cave itself is a crystal structure. Standing near the crystal will drain Burden two stacks at a time, and as you fill it, the structure expands physically alongside a sound cue.
Once crystals have expanded, there will be another unique sound and a burst of white energy. For this first encounter, filling the crystal will cause the floor of the loot cave to collapse into more crystals, leading you down into the depths. Follow the path along the left side of the cliff face until you reach a large blast door.
Now the fun begins.
Route to the Second Encounter: The Trap-Laden Path
There are only a few enemies in this next section. Your main threat is instead a long series of rooms and corridors filled with spike traps, bottomless pits, and other means of instantly killing your Guardian.
Near the blast door, which you'll note by the blue arrows pointing toward it, shares its small room with two regular sized doors. One of them has a skull and crossbones symbol near it. That's the one you want. The other one without the warning has a wall of extending spikes behind it that will kill you.
Beyond the skull and crossbones door is a small room with a lever at the other end. Watch out for the raised switch on the floor. It activates more spikes. You'll also see it again and again as you progress. Jump over the spike switch, activate the lever, and go into the pipe.
At the end of the pipe, you'll reach a long room with a bottomless pit. There's a small platform in the middle of the room, which is actually a collapsing floor. There's another lever at the other end of the room, but it's bait. Activating it will drop the ceiling above the console and kill you.
To progress, jump on the collapsing floor and fall just a little bit. There's another small room beneath with the actual lever you want. Activate it and return to the blast door chamber.
This time, jump up the vents until you can see three smaller pipes leading into the wall. Take the one closest to the blast door, or farthest from where you can jump from. Activate the floor switch and jump through the opening in the ceiling that appears.
Continue your way up, watching out for any spike traps. You'll soon reach a water basin with moving doors along both walls. Head into the one closest to the left of the platform where you start. Clear the room of enemies, then flip the lever at the end of the room. There are spike traps here, too, so be careful.
Exit the first room and head to the newly opened vent on the right side of the chamber. Activate the switch inside and jump across the chasm. Take the opening of the ceiling up into a room with another lever. Activate it and return to the main chamber. Head back across the chasm and deactivate the switch in the room. Beware the Shrieker that spawns.
One of the large bay doors near the entrance to the lock will be open. Clear the enemies and activate the switch at its back. Doing so opens the doors at the other end of the room. Make your way there, clear the enemies, and open the door bathed in orange light. The other one will kill you.
You'll reach a large circular room with Fallen and Hive enemies inside. Head right of where you come in to find a circular design on the wall above another switch. Activate it to open the bay doors on the other side of the room, Bay 3. Head over, clear the enemies, and activate the switch inside. Repeat this process until all but one of the doors is open. A group of Fallen will spawn out of Bay 2, and the yellow bar Vandal will have a Scorch Cannon.
Grab the cannon and make your way to Bay 4, where you'll see a Fallen deposit device. Veterans of Scourge of the Past will recognize it. Shoot a single shot from the cannon into the device and hold down the fire button so the missile doesn't immediately go off. Let the charge tick three times, and the door will open.
Beyond Bay 4 is a long, red-lit staircase. Go up only far enough to reach the first alcove and make your way inside. A huge barrel will come crashing down the stairs, and will kill you. There's only one barrel, so make your way into the hall at the top of the stairs.
Travel until you reach a dead end room, then turn around. You should see an orange-lit vent to take. Go into the vent and continue across the waterlogged room beyond it. At the end of the hallway, you'll come out into a boss arena, the first of two such fights in Grasp of Avarice.
Second Encounter: Boss Fight with Phyr'zhia the Insatiable
The first real fight of the dungeon is with the giant, angry Ogre Phyr'zhia the Insatiable. You'll be using both mechanics you've been taught so far: banking engrams and Scorch Cannon doors. This time, however, you have to contend with rapid-fire laser beams from the boss and hordes of enemies.
To start the encounter, simply jump across the chasm from the room's entrance where the Rally Flag goes to start the encounter.
Shortly after the fight begins, a Fallen Vandal will appear, wielding a Scorch Cannon. Kill it, take the cannon, and look for the deposit device with the open hatch. There are two devices on either side of the arena, and they control a set of bay doors leading to separate, smaller arenas.
Only one device will have its port open at a time, and be careful about opening both. If you activate both devices, the doors opened first will close, trapping and killing anyone left inside.
Once the doors open, two Hive Knights and ten or so Acolytes will spawn. Kill them to take their engrams, then head to the back of the arena to bank them. You'll need to do this twice to activate the damage phase of the fight. Once it's time to DPS the boss, hang around the engram crystal with Well of Radiance and a Titan bubble, if available. Use your standard damage tools: 1000 Voices, Fusions Rifles, Sleeper Simulant (especially after the buff), or whatever you and your team uses.
It is possible to one-phase Phyr'zhia the Insatiable, but more than likely, you're going to need two damage phases to take him down. The process is the same no matter how many tries it takes. Kill Vandal, take Cannon, open Hive areas, kill Hive, bank engrams, damage boss.
Path to the Third Encounter: Sparrow Racing the Bombs

Once you defeat Phyr'zhia the Insatiable, collect your first loot drops of the Dungeon and head to the back of the arena. The doors are open now, and you'll follow the halls back and to the left. Go down through the Hive chitin-infested rooms until you reach a large pair of blast doors.
You'll face one last pair of levers, and only one of them won't kill you. That's the left one. Don't tell your friends about the right one. Let them experience it.
Once you activate the left lever, the blast doors open, and Scorn Mine will spawn, leaving you with fifteen seconds to reach and disarm it. You need to be on your Sparrow and boosting when you start to see light creep through the opening doors. If you do nothing else, you'll need all fifteen seconds to reach the mine and disable it. There are four mines in total to disarm.
The secret to this encounter lies in the large red buttons scattered about the map. They're small spheres with a big red light that turns green and sounds and a low beep when active. You don't need to be exact when touching them to turn them on; just be within a couple of feet.
Turning on the buttons will add time to the mine's detonation timer, about five seconds in most cases. There are two or three buttons per area, and most are located on the sides of the critical path toward the mines. If you're in a team of three, have your best Sparrow driver go first and task at least one other squadmate with seeking out the buttons.
Once you disable mine D in the giant skull, you're done. Make your way through the crystal caves to reach the third encounter.
The Third Encounter: Fallen Shield

Your task here is to disable the shield beneath the giant sphere in the center of the area. To do so, you need to destroy the four glowing batteries on its side. Doing so is a little involved, and continues to use the mechanics you've learned so far.
There are five islands in this room. You won't be able to reach most of them by jumping (save for select classes and with specific Exotics), but thankfully each island has an inactive man cannon. To activate the man cannons, you need a Scorch Cannon, and the islands have one such Vandal a piece.
When you arrive in the Fallen Shield arena, look for a shielded Servitor floating around on one of the islands. Kill the Scorch Cannon Vandal, then find the deposit device. Let the missile charge and head to the base of the man cannon. Let the Scorch missile detonate to activate the man cannon for a short time. You can also rotate the man cannon by pressing your "Use" button.
To remove the Servitor's shield when you reach it, you have to, yes, bank engrams. Fallen will spawn on the Servitor's island and drop Burden of Riches engrams when defeated. Bank twenty or so to lower the shield, letting you take out the Servitor.
Unlike most enemies, these Servitors leave a rollable corpse behind. Use your mighty Guardian shoulders to push the dead Fallen ball to the base of its island's man cannon, aim said cannon at the battery, and activate it. Do this successfully four times, and you'll lower the Fallen Shield guarding the giant sphere above you. If you accidentally lose a Servitor-ball, another live one will spawn on another island.
With the shield down, head to the central man cannon and aim it directly upwards. Activate it to enter the sphere and the path to the final encounter.
The Fourth and Final Encounter: Avarokk the Covetous and his Hearty Crew

In the center of the Great Sphere is the final arena. The setup is similar to the Phyr'zhia fight, but the engram crystal is in the center of the area on the raised platform.
There are two deposit devices on either side of the main support span. When activated, they cause two large containers per side to rise and spit out ten engrams, twenty total. You'll need to find the Scorch Cannon Vandal, but he doesn't spawn immediately. You need to clear the initial wave of adds, then you'll have a brief period of calm to bank motes in the middle.
There's one complication. The boss, Avarokk the Covetous, and two yellow bar mini-bosses whose names you need to see to believe. One of them is a large, hard-hitting Marauder; the other is a Tracer Shank who hits like a Mack truck. Both drop ten engrams when defeated, and you'll want to for the damage phase. Be aware that the two mini-bosses respawn each phase, but nothing else changes.
The engram crystal needs at least fifty engrams to charge fully and make the boss vulnerable. Once you deposit enough, Avarokk will head to the bow of the ship by a large box and stand there waiting for you to hit him. You'll have thirty seconds or so to do as much damage as possible, then he will go Immune again. Repeat the process as many times as it takes to defeat Avarokk and complete the Grasp of Avarice.
Let us know in the comments below if this walkthrough helped you. You may want to take a look at our guides on how to get the Gjallarhorn in Destiny 2 as well as how to get the Gjallarhorn Catalyst in the Grasp of Avarice. Or of course, any of our other Destiny 2 guides.
Published Dec. 9th 2021
How Do You Track Whisper Progress Destiny 2
Source: https://www.gameskinny.com/rl8qq/destiny-2-grasp-of-avarice-dungeon-walkthrough-guide
0 Response to "How Do You Track Whisper Progress Destiny 2"
Post a Comment